Getting Started with Trezor.io/start: A Comprehensive Guide
When you visit Trezor.io/start, you're taking the first step towards securing your cryptocurrency assets. This official onboarding portal is designed to guide you through the process of setting up your Trezor hardware wallet, ensuring that you can manage your digital assets with confidence and peace of mind.
Why Choose Trezor.io/start for Your Hardware Wallet Setup
Trezor.io/start offers a streamlined, user-friendly experience for both beginners and experienced users. By following the steps provided on Trezor.io/start, you can safely initialize your device, create a secure wallet backup, and set a PIN to protect your device from unauthorized access.
Step-by-Step Guide to Setting Up Your Trezor Device via Trezor.io/start
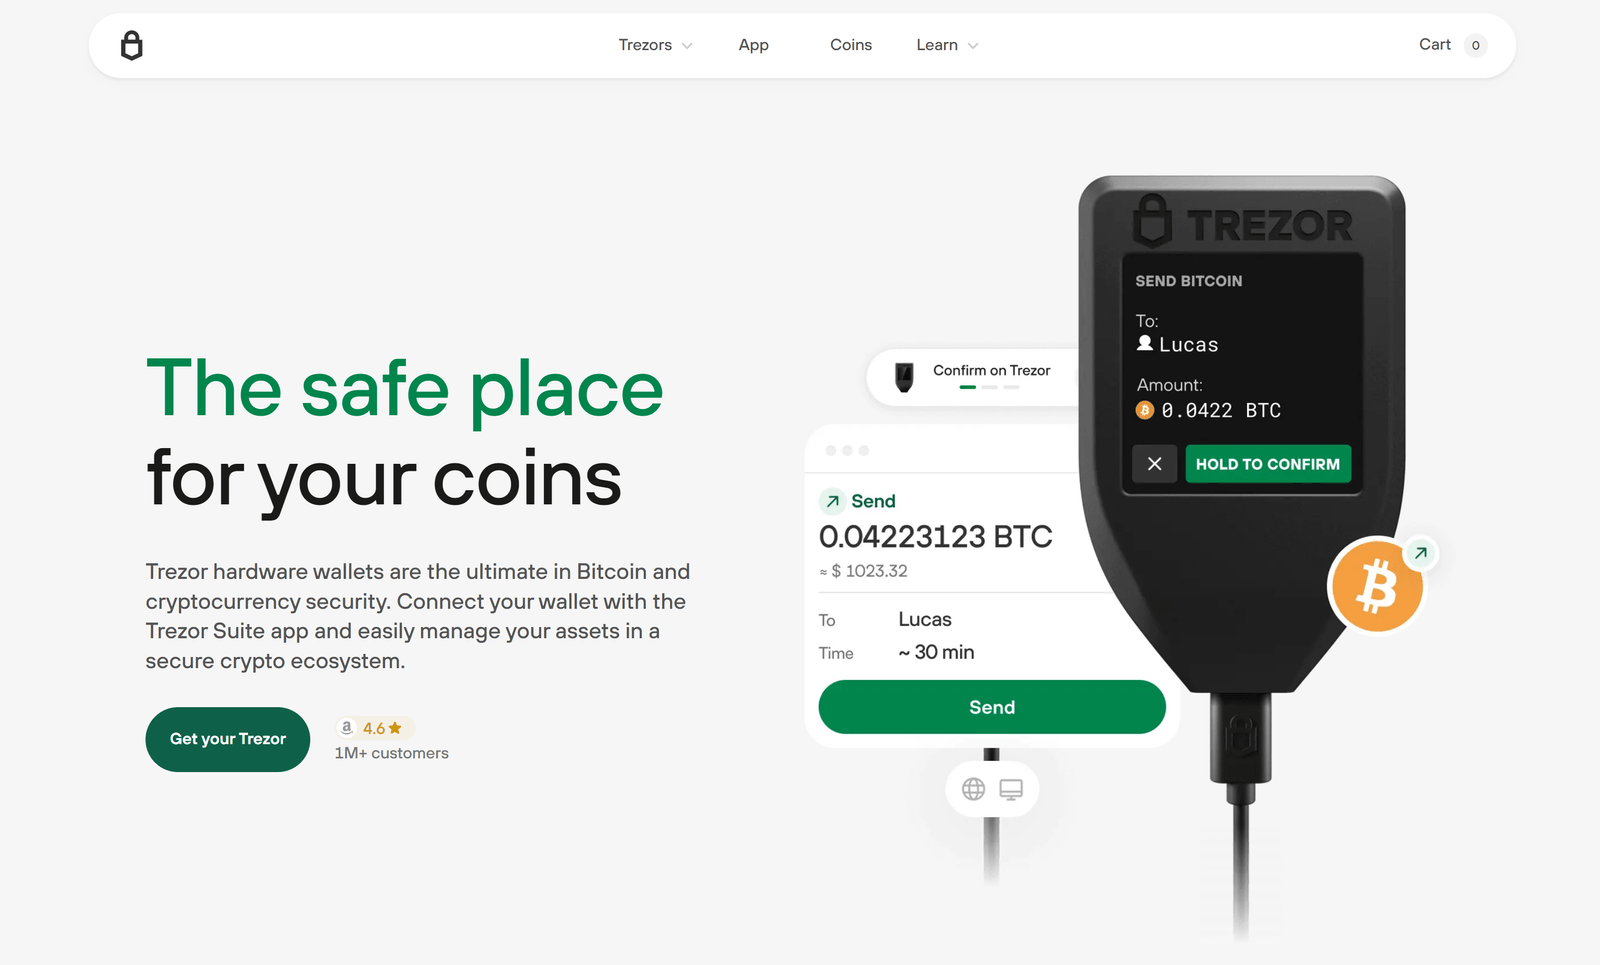
To begin, navigate to Trezor.io/start and plug in your Trezor device. The website will prompt you to install the necessary firmware and guide you through the process of creating a secure wallet backup. Once your device is set up, you can access your wallet through the Trezor Suite application, available for both desktop and mobile platforms.
Understanding the Importance of a Secure Wallet Backup on Trezor.io/start
During the setup process on Trezor.io/start, you'll be prompted to create a wallet backup. This backup is crucial for recovering your funds in case your device is lost, stolen, or damaged. It's important to write down your recovery seed on paper and store it in a safe place, separate from your device.
Setting a PIN on Trezor.io/start to Protect Your Device
After creating your wallet backup, Trezor.io/start will guide you through setting a PIN for your device. This PIN adds an extra layer of security, ensuring that even if someone gains physical access to your device, they cannot access your funds without the correct PIN.
Transferring Your Cryptocurrency to Your Trezor Wallet via Trezor.io/start
Once your device is set up through Trezor.io/start, you can begin transferring your cryptocurrency from exchanges or other wallets to your Trezor wallet. The Trezor Suite application provides a simple interface for generating receiving addresses and monitoring your transactions.
Advanced Features Accessible Through Trezor.io/start
Beyond basic wallet setup, Trezor.io/start also introduces you to advanced features such as passphrase support, coin staking, and integration with third-party applications. These features enhance the functionality of your Trezor device, allowing you to manage your digital assets more effectively.
Ensuring Device Authenticity During Setup on Trezor.io/start
To ensure the authenticity of your device, Trezor.io/start includes a verification step during the setup process. This step helps confirm that your device is genuine and has not been tampered with, providing you with added confidence in the security of your assets.
Utilizing Trezor.io/start for Firmware Updates
Regular firmware updates are essential for maintaining the security and functionality of your Trezor device. Through Trezor.io/start, you can easily check for and install the latest firmware updates, ensuring that your device is always up to date with the latest security patches and features.
Accessing Expert Support via Trezor.io/start
If you encounter any issues or have questions during the setup process, Trezor.io/start provides access to expert support. You can schedule a one-on-one session with a Trezor expert who will guide you through the setup process and address any concerns you may have.
Conclusion: Securing Your Digital Assets with Trezor.io/start
By following the steps outlined on Trezor.io/start, you can ensure that your cryptocurrency assets are securely stored and protected. The comprehensive setup process, combined with advanced features and expert support, makes Trezor.io/start the ideal starting point for anyone looking to secure their digital assets with a Trezor hardware wallet.